NOTE:
The LaneWatch camera must be aimed after one or more of the following procedures are done:
- LaneWatch camera removal or replacement
- Passenger’s power mirror removal or replacement
- Passenger’s door panel body repair
- Passenger’s door position adjustment
Set up the vehicle:
- Make sure there are no other objects except the aiming target in this area.
- Check the tyre pressures, and adjust them to the specified value if needed.
- Put a person or an object equivalent to the driver’s weight in the driver’s seat.
- Park the vehicle on level ground in a wide open area to avoid any reflection from objects that could affect the alignment procedure. Make sure you have at least the following amount of space around the vehicle: 6.5 m (21.3 ft) in length, 3.5 m (11.5 ft) in width.
- Install the aiming target on the passenger’s side of the vehicle.
- Do the aiming in a proper place where you can obtain about 4.5 m (14.8 ft) distance between the target pattern and the vehicle (from the center of the front wheel hub).
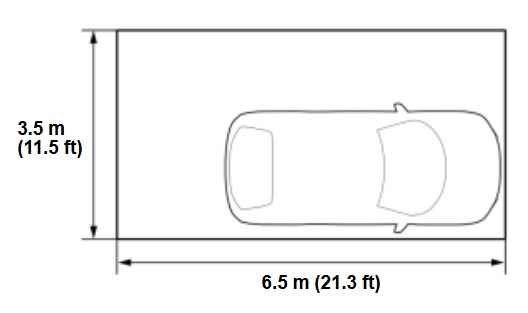
NOTE: When marking on the floor surface, use suitable tape to mark the exact locations.
Prepare these items:
- Tape measure and ruler
- Felt-tip pen
- Tape
- String
1. Marking of the Target Position – Set
■ Preconditions
- Transmission P Position/Mode
- Parking Brake Applied
|
■ Procedure
|
|
3.
|
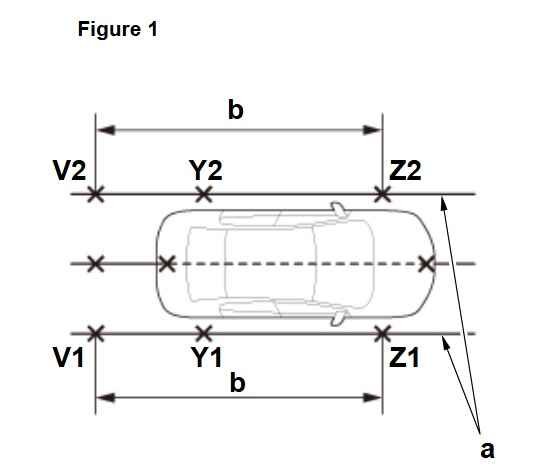
Measure and make a new spot V1 on the floor surface in rear of the vehicle from the point Z1. (Figure 1)
|
|
NOTE: Repeat this step for the opposite side, and mark a new spot V2. (Figure 1)
|
Distance Specifications (Figure 1)
| Position | Standard value |
| b | 4,500 mm (177.17 in) |
|
5.
|
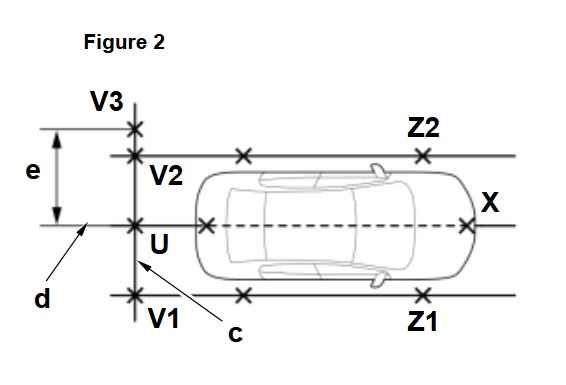
On the string, measure and make a new spot V3 on the floor surface in passenger’s side from the point U. (Figure 2)
|
Distance Specifications (Figure 2)
| Position | Standard value |
| e | 1,300 mm (51.18 in) |
|
6.
|
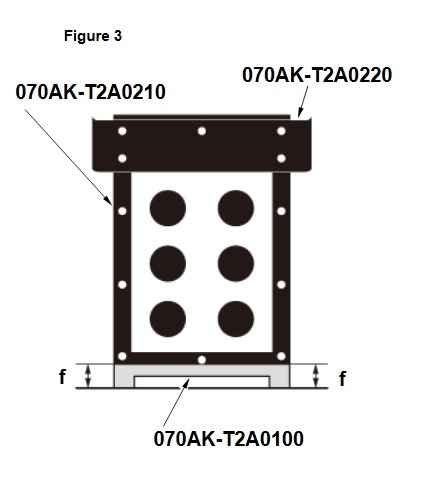
Set the aiming marker A and B to the LaneWatch aiming stand set, and adjust the height of the aiming marker. (Figure 3)
|
Specifications (Figure 3)
| Position | Standard value |
| f | 50 mm (1.97 in) |
|
7.
|
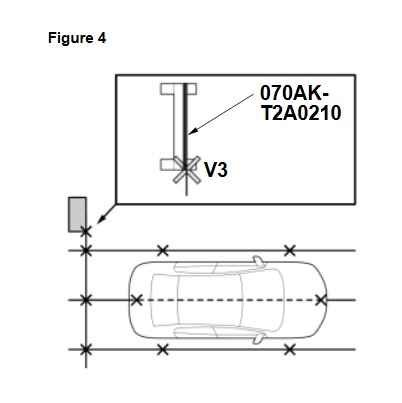
Place the left side edge of the aiming marker on point V3 that you made in the previous step. Align the legs of the marker with the string to make sure the marker is square to the vehicle. (Figure 4)
|
2. LaneWatch Camera – Aim
■ Procedure/Specifications
NOTE:
To stop the aiming procedure, turn the vehicle to the OFF (LOCK) mode.
If you press the LaneWatch switch while in the aiming mode, the current aiming data will be cleared.
Post Comment